Tuesday, December 11, 2018

How to use ViPER4Android FX to improve the sound on your Android


There are certain basic elements about life and nature that humans have been trying to perfect for ages. The attraction that the human ear has to the sounds and music, in general, has led to the creation of musical instruments, sound devices and a billion-dollar music industry that is not only a source of inspiration and entertainment but a livelihood for many.

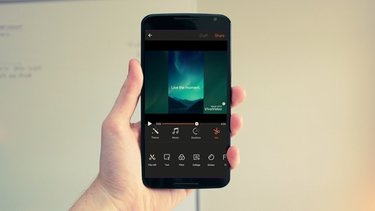
Mobile phones have been designed to be the all-in-one replacements for the outdated portable music devices, but they are capable of doing so much more. Apart from offering music seamlessly through online services, the ability to fine-tune the hardware and software of Android devices makes them the perfect specimens for audio equalizers such as Viper4Android.
What is ViPER4Android FX?

Developed by a popular audiophile who goes by the name ViPER520, this piece of technology is designed to be the ultimate equalizer app. The ViPER4Android FX app comes with built-in support for sound drivers that can fine-tune the sound for Headphones, Speakers, and Bluetooth Audio devices separately.

The only reason you cannot find ViPER4Android FX on the Google Play Store is just like most of the hardcore apps, it requires root access. Moreover, ViPER4Android FX is also available as a module for you to install directly from the Magisk Manager as well. Here’s how you can install the Viper4Android FX the easiest way on your Android phone.


Make sure that your Android device has root access.


Download and install the ViPER4Android FX APK file. (Download Link)


You can also search for the ViPER4Android FX Module in the Magisk Manager.


Once you have the ViPER4Android FX app installed, grant it Superuser.
How to use ViPER4Android FX

At a first glance, the ViPER4Android FX may seem a bit overwhelming with all of the different sound editing options that are available at your disposal. In order to make it easier for you to configure and fine-tune the settings to enjoy the best possible audio experience you can from your Android device.


Master Power

This is essentially the main switch to turn on and off all of the sound effects under each of the sections of the ViPER4Android FX app.

AnalogX

Gives the simulation effect of a Class A amplifier to create a warmer sound effect.

Playback gain control

Additional control to make the headphones louder or quieter even when the system volume is set on maximum.

Differential Surround

Improves the overall surround-sound effect when listening to music using headphones.

ViPER-DDC

Reduces the crossover sound effect of lows and highs and prevents background humming sounds.

Auditory System Protection

Reduces the chances of physical damage to the ears due to continuous high-volume music and sounds.

FET Compressor

The FET (field effect transistor) is designed to add a bit of a kick to the sound effects in the music being played with more transients.

Apart from these options that we tried out, there are plenty of others that you can implement to create a custom sound profile. Once you have decided the variables you want to set for your personal sound profile, you can save it for later use.
How to save ViPER4Android FX profile


Tap on the three-line menu icon on the top-right corner.


Select the Save Effect Profile and select New Effect Profile.


Type in the name of your personal sound profile and hit OK.

Are you among those who are going to be psyched about recreating the audio profile on their smartphone with the ViPER4Android FX app? Be sure to share your thoughts in the comments section right down below.

Related Articles:

Backup & Restore Viber Messages On Android

Recover WhatsApp Messages from Android

7 Best FRP Bypass Tools to Bypass Google Account on Android 2019

Top 8 Free Equalizer and Bass Booster Apps for Android 2019

10 Android Fitness Apps To Help You Shed Off Pounds

How to Save Photos and Videos in Snapchat on Android


Jihosoft Photo Eraser

Erase unwanted objects and perfect your amazing photos!

Remove objects from photos with Photo Eraser is almost as easy as taking a shot. Now you can use this tool to erase undesirable objects from your pictures, such as tourists, watermarks, logos, texts, blemishes and other unwanted things without real photo-editing skills required at all.


Jihosoft Android Data Recovery

The most powerful and professional data recovery software for Android that can restore deleted or lost contacts, photos, videos, audios, SMS, call logs, WhatsApp chat, Viber messages from any Android devices due to accidental deletion, virus attack, formatting. It supports all popular Android smartphones and tablets like Samsung, HTC, LG, Huawei, Motorola, Nexus, etc. In the meantime, you will be guided step by step if you never used this kind of tool before.

Friday, November 30, 2018

Best 5 Partition Software You Must Know 2019


1. MiniTool Partition Wizard Home Edition

MiniTool Partition Wizard is one of the best partition software out there. Its Home Edition is free to use and is suitable for a single home user. The software is equipped with all the necessary features to fulfill your partitioning needs.

Following are some features of this software:


Basic and advanced partition management features such as create, delete, format, move, wipe, merge, and hide partitions.


Change drive letter, set partition label, convert partition file system, and more.


Additional functions such as partition recovery, copy volume, change cluster size, and more.
2. AOMEI Partition Assistant

AOMEI Partition Assistant is suitable partition software especially for those users who aren’t tech-savvy. The software is very easy to use thanks to its user-friendly interface and most of its functions are easily accessible.

Following are some features of this software:


Copy, resize, extend, delete, and format partitions.


User-friendly software interface.


Quick Partition feature allows you to create and manage partitions with the same layout.


Windows To Go Creator feature allows you to put Windows installation on USB drive.

3. Paragon Partition Manager


Paragon Partition Manager is standalone and easy-to-use partition software. Upon launch, it shows detailed information of all the partitions and you can even customize the interface according to your preferences for easy operation.


Following are some features of this software:


Create, format, resize, delete, and copy partitions easily.


Customizable software interface.


File system conversion, disk cleanup, data migration, and more advanced features.

4. Gparted


Gparted is another popular partition manger that supports various file systems. The software is quite popular among Linus OS users as well thanks to its reliability and performance.


Following are some features of this software:


Copy, move, and resize partitions without losing data.


Supports all popular file systems.


Manipulate partition file systems, copy and paste, label, set new UUID, and more.

5. EASEUS Partition Manager


EASEUS Partition Manager is the best partition software you can count on. It has a user-friendly and intuitive interface and it is equipped with all the necessary features to help you manage your partitions effectively.


Following are some features of this software:


User-friendly and intuitive software interface.


Move, copy, resize, hide/unhide, convert, format, and explore partitions.


Fully compatible with all Windows versions.


Sponsor ads:


Gihosoft Free iPhone Data Recovery:https://www.gihosoft.com/iphone-data-recovery-free.html


Gihosoft iPhone Data Recovery Free


Free iPhone Data Recovery Software for Windows/Mac


Recover up to 12+ types of files, including contacts, SMS, photos, WhatsApp, Viber, notes, etc.


Restore lost data from iOS devices directly or from iTunes and iCloud backup


Recover iPhone data lost due to iOS upgrade/jailbreak, accidental deletion, device lost or broken


Support all the latest iPhone, iPad and iPod Touch


Both Free and Pro version.


If you lost data after you updated to a new iPhone, you can always use Gihosoft iPhone Data Recovery to get the data back from the old iPhone or backup.You may also like: iphonerecovery.com


If you use android phones, please choose Gihosoft Android Data Recovery.


With Gihosoft Android Data Recovery, no longer afraid of data loss!

Worth reading:Best youtube downloader online download youtube 1080p


Recover WhatsApp Audio Messages from iPhone Backup

Recover WhatsApp Audio Messages from iPhone Backup


Recover WhatsApp Audio Messages from iPhone Backup


If you have an iTunes or iCloud backup of your device, you can also get your missing Audio messages by restoring the backup. Here's how to do it for both iTunes and iCloud.
Restore from iCloud


Step 1: Go to Settings > General > Reset > Erase all contents and Settings. This should bring you to the setup screen.


Step 2: Follow the instructions until you get to the "App & Data" screen and then choose "Restore from iCloud Backup."


Step 3: Sign in to iCloud and select a backup. Wait for the restore process to complete.


Restore from iTunes


Step 1: Open iTunes and connect the iPhone to the computer.


Step 2: Click on the iPhone once it appears on iTunes and then click on "Restore Backup". Select a backup and then click "Restore."


Sponsor ads:


Gihosoft Free iPhone Data Recovery:https://www.gihosoft.com/iphone-data-recovery-free.html


Gihosoft iPhone Data Recovery Free


Free iPhone Data Recovery Software for Windows/Mac


Recover up to 12+ types of files, including contacts, SMS, photos, WhatsApp, Viber, notes, etc.


Restore lost data from iOS devices directly or from iTunes and iCloud backup


Recover iPhone data lost due to iOS upgrade/jailbreak, accidental deletion, device lost or broken


Support all the latest iPhone, iPad and iPod Touch


Both Free and Pro version.


If you lost data after you updated to a new iPhone, you can always use Gihosoft iPhone Data Recovery to get the data back from the old iPhone or backup.You may also like: iphonerecovery.com


If you use android phones, please choose Gihosoft Android Data Recovery.


With Gihosoft Android Data Recovery, no longer afraid of data loss!


Worth reading:Best youtube downloader online download youtube 1080p


Wednesday, November 28, 2018

Lock WhatsApp with Pattern or Password on Android 2019


WhatsApp, in the last few years, has surely evolved as a most helpful and at the same time widely used instant messaging app. With billions of active users monthly from the whole wide world. It is no wrong in saying that WhatsApp can be the first application that people download while purchasing a new smartphone. The reason being, WhatsApp has so much to offer, you can send quick messages, images, videos, and even audio messages! But with all these amazing features, the main issue that comes in between is of privacy and security. As in today’s time, having security in life is as important as oxygen for a living. But we are not talking about the privacy you get inside your WhatsApp, as for that WhatsApp has got you covered. But, the privacy you need before you open your WhatsApp. As there are times when someone takes your mobile and you don’t want them to read your WhatsApp chats, for whatever reason. But saying this directly can give you a suspicious eye. So, to avoid this awkward situation, you can secure your WhatsApp with a pattern or password.


Also Read: How to Recover Deleted WhatsApp Messages on Android from/without Backup


So, if you are someone who wants to protect their important messages or personal data on WhatsApp from getting leaked. Then simply follow the steps that are mentioned below.
How to lock WhatsApp With Pattern


Install and open the AppLock application from the Google Play Store.


Once opened, draw an unlock pattern for the application. And then add a security email account.


Now under “General” category, search for WhatsApp and tap on it. Agree to the permissions by turning on the toggle of “Permit usage access”.


Once done, you will see, your WhatsApp now has a lock sign beside its name. And that’s it you are done. Now, whenever you have to open WhatsApp make the same pattern you did in the second step.

Also Read: How to Backup and Restore WhatsApp Message on Android or iPhone

Although if you want to change the pattern, you can do it by tapping on the “Protect” option from the right side. And then tap on “Pattern lock”. Now click on “Change unlock pattern” and draw a new one. Just make sure to connect at least 4 dots. This is how you can pattern lock WhatsApp.
How to lock WhatsApp With Password


If you don’t want to keep a pattern as your security lock. And you trust more on a password then don’t worry we have got you covered even for this.


Install and open the AppLock application from the Google Play Store.


Once opened, draw an unlock pattern for the application. And then add a security email account.


Now under “General” category, search for WhatsApp and tap on it. Agree to the permissions by turning on the toggle of “Permit usage access”.


Once done, you will see, your WhatsApp now has a lock sign beside its name. But, by default, the app renders a pattern unlock. So, now for the password, you need to go to the “Protect” option from the right side. Tap on “Unlock Settings” and then click on “Password”. Now, enter a password and your new password will get saved. That’s it now whenever you want to open WhatsApp just enter the password you have saved before.


A powerful Android data recovery software designed to help Android users recover deleted contacts, messages, call logs, WhatsApp chats, photos, music, videos, etc. from their phones and tablets, with a user-friendly interface and advanced scanning technology.

So, here are the steps through which you can lock WhatsApp with Pattern or Password without any hassle. In addition, the app also provides with a ‘Fingerprint Lock” which you can use only if you have a fingerprint sensor in your device. Now there are also other convenient features too which you can explore once you download this application. So, now with the mentioned steps, make your WhatsApp safe from snooping and dust off the stress from your shoulders.


You might like: How to Hide WhatsApp Chat Conversations in Android and iPhone

So, if you find this article helpful or interesting, share it on social media with your friends. And mention your views in the comment box below.

Thursday, November 15, 2018

How to recover Deleted Call Log Recovery for iPhone 2019

How to recover Deleted Call Log Recovery for iPhone 2019


Free Way: Restore from iCloud/iTunes Backup

We are introducing you the other ways to recover your data from iCloud and iTunes backup. If you have iTunes or iCloud backup, you can also restore the backup to your device. Here is how you can do it.
Restore from iCloud Backup

In order to exercise iPhone call log recovery from iCloud backup, you need to setup your device once again. Therefore, for doing this, all you need to erase everything from your device i.e. perform factory reset in your device. Here are the steps:

Step 1 – open 'Settings' and go to 'General'. Tap 'Reset' followed by 'Erase All Contents and Settings'.


Step 2 – After when your device will undergo factory reset, it will reboot. On turning it on, go through the setup process and then from the 'Apps & Data' screen, tap 'Restore from iCloud Backup'.

Step 3 – It's time to sign in to iCloud account. Enter the necessary details and you will get the list of iCloud backup. Select the one you need and restore. The deleted call logs will be with you in a while.


Restore from iTunes Backup

Step 1 – To initiate, launch iTunes and then connect your iPhone with the PC via a lightening cable. On the main interface of iTunes, click the device icon followed by 'Summary' tab.

Step 2 – Now, from the 'Backups' section, all you need is to click on 'Restore Backup' button. From the next pop-up window, choose the backup and the click 'Restore' lastly.


Sponsor ads:

Gihosoft Free iPhone Data Recovery:https://www.gihosoft.com/iphone-data-recovery-free.html

Gihosoft iPhone Data Recovery Free

Free iPhone Data Recovery Software for Windows/Mac

Recover up to 12+ types of files, including contacts, SMS, photos, WhatsApp, Viber, notes, etc.

Restore lost data from iOS devices directly or from iTunes and iCloud backup

Recover iPhone data lost due to iOS upgrade/jailbreak, accidental deletion, device lost or broken

Support all the latest iPhone, iPad and iPod Touch

Both Free and Pro version.

If you lost data after you updated to a new iPhone, you can always use Gihosoft iPhone Data Recovery to get the data back from the old iPhone or backup.You may also like: iphonerecovery.com


Wednesday, November 14, 2018

4 Best Windows 10 Apps for Making a Photo Slideshow 2019


1. MICROSOFT PHOTOS

Size: 257MB

Yes, you read that right. The updated Microsoft Photos hides plenty of features, and one of them is the built-in slideshow maker dubbed Video Maker. The app is simple and straightforward. Just upload your photos in the order which you want, and Photos will churn out a digital slideshow.


It also gives you many customization options such as the photo duration, filters, text, and transition effects — basically everything that a bare-bones slideshow maker should include. The duration of each photo goes up from a second to a maximum of 7 seconds. What's more, you can also insert videos in between.


Microsoft Photos supports a simple drag-and-drop feature using which you can sort and select your pictures and videos. Since it's a Microsoft app, you can rest assured that the photos which you add will be safe. Plus, there's no ads and banners to distract you.


PRO TIP: Did you know that Microsoft Photos can transfer photos from your phone's gallery to your PC wirelessly? All you have to do is connect your phone and PC to the same Wi-Fi, tap on the Import option, and scan the QR code.

Download Microsoft Photos
2. ICECREAM SLIDESHOW MAKER

Size: 56MB

Icecream Slideshow Maker is an old name in the world of slideshows. It bundles a neat feature-set which makes creating slideshows fun and easy. Though it's a feature-packed tool, it doesn't have a cramped UI. Instead, the interface is as simple as it can get.


What I loved about this app is its simplicity. It packs everything in a single window. From music to transition effects and duration, you can play around a lot.


Unlike the in-house Photos app, this one gives you the freedom to choose your output file format. You can select from MP4, MOV and AVI formats. There's also the option to add your audio tracks and music offset, among others.Sponsor ads:

Gihosoft Free iPhone Data Recovery:https://www.gihosoft.com/iphone-data-recovery-free.html

Gihosoft iPhone Data Recovery Free

Free iPhone Data Recovery Software for Windows/Mac

Recover up to 12+ types of files, including contacts, SMS, photos, WhatsApp, Viber, notes, etc.

Restore lost data from iOS devices directly or from iTunes and iCloud backup

Recover iPhone data lost due to iOS upgrade/jailbreak, accidental deletion, device lost or broken

Support all the latest iPhone, iPad and iPod Touch

Both Free and Pro version.

If you lost data after you updated to a new iPhone, you can always use Gihosoft iPhone Data Recovery to get the data back from the old iPhone or backup.You may also like: iphonerecovery.com


In short, this app is a powerhouse for a slideshow maker. Aside from the above features, Icecream Slideshow Maker also gives you the option to upload your project directly to Dropbox, Google Drive or YouTube.

Download Icecream Slideshow Maker
3. MOVAVI SLIDESHOW MAKER

Size: 175MB

One of the key features of Movavi SlideShow Maker is Themes. Depending on the type of your pictures and images, you can uplift the overall look of your slideshow. Unlike the above two apps, Movavi looks professional with a dozen different helpful features such as Opening titles, end titles, adding subtitles, different output file formats, stickers, among many others.


Furthermore, the app interface is intuitive and self-explanatory. You have to go with the flow, and the video will be ready in a few minutes. The only issue with this app is that it doesn't let you add filters.


As useful as it is, the only catch is that Movavi is a paid app. It costs about $20. Thankfully, there's a free trial of seven days during which you can see if it is worth investing.

Download Movavi Slideshow Maker
ALSO ON GUIDING TECH


4. PHOTO SLIDESHOW WITH MUSIC

Size: 70MB

Photo SlideShow With Music does its job as advertised - it creates slideshows easily and quickly. Simply select and upload the pictures, and the resulting video will save to your PC. It bundles in a variety of additional features like Filter, Transitions, Music, Stickers, among others.


We tried this tool by adding 20+ images, and it did its job as described. Plus, the rendering time isn't much. What's great about Photo SlideShow is that there's plenty of music tracks to choose from. Moreover, you can also add music from your private collection.


Since it's a freemium app, some features such as transitions are accessible after upgrading. What I didn't particularly like about this app are the somewhat obstructive ads. Should you begin to love this app, you can pay and get the ads removed.

Download Photo SlideShow With Music
CREATE AWESOME STORIES

Whether it's for your Instagram Stories or Facebook uploads, slideshows are a great way to tell your stories. And you can add your personal touches to them through text, stickers, and music. Just make sure that the individual duration isn't too long, as your audience might get bored quickly. You have to strike the right balance between the music, content and the time, and you'll be good.


Wednesday, September 12, 2018

How to Clear All Messages on WhatsApp


You can clear all the messages of a single chat or all chats at once on WhatsApp.


Also Read: How to Restore Deleted WhatsApp Messages on Android


Here is how you can clear all the messages of a single chat at once:


​Open WhatsApp on your Android device.


Open the chat (individual or group) you want.


Tap Overflow Menu (three vertical dots) at the top.


Tap "More" and then tap "Clear chat."


Now, you can see anyone of this confirmation popup:


​You can see the first image if you don't have starred messages in the chat and you can see the second image if you have starred messages in the chat.


​Now, you can see "Delete media from my phone" option which is selected, by default. You can leave it intact if you want the media from the chat to be deleted from your phone. Else, unselect the option.


If you see the first image, then tap "Clear."


If you see the second image, tap "Clear All Messages" (in case, if you want to clear all messages of the chat except starred messages, then tap "Clear All Except Starred" ).


That's it. All done.


If you want to delete all messages from all chats at once, then follow the below steps:


​Open WhatsApp on your Android device.


Tap Overflow Menu (three vertical dots) at the top > Settings > Chats > Chat history.


Tap "Clear all chats" option which is between "Archive all chats" and "Delete all chats."


In the confirmation popup, you can see the following:


Delete media from my phone - Select this option if you want the media from all the chats to be removed from your phone.


Clear All Messages - Clear all the messages from all the chats at once.


Cancel - Close this confirmation popup.


Clear All Except Starred - Clear all the messages from all the chats at once except the starred messages.


​Choose the option as per your need.


That is all. All done.


I hope that this post is useful to you. If it is, share this post with your friends.
More Related Tips You May like:


How to Backup and Restore WhatsApp Message on Android or iPhone


How to Change Your Phone Number On WhatsApp


Top 8 Methods to Run Two WhatsApp Accounts on One Phone Easily

How to Fix iPhone X Stuck on FaceTime Ending


How to Fix iPhone X Stuck on FaceTime Ending
1. Shut Down iPhone X from Settings
When you see your iPhone X stuck on FaceTime ending, you would normally try to switch it off but to no avail. Therefore, we suggest you to turn your iPhone X off with the help of Settings. Just head to 'Settings' > 'General' and scroll down to look for the 'Shut Down' option. Tap on it and your device will be rebooted. Upon turning the device on, check if your iPhone X is stuck on FaceTime call ending screen or not. Hopefully it will not!

2. Reactivate FaceTime
The above attempt to fix the issue can prove to be temporary. That is to say, you may get this annoying trouble after when you use FaceTime again. Therefore, here's the next suggestion in case you face such problem. Just deactivate the feature and activate once again. Go to 'Settings' and tap 'Message' > 'Send & Receive' > 'Apple ID' > 'Sign Out'. Turn off FaceTime now. Then enable it after a while. Enter Apple ID again and reactivate the feature.

3. Force Restart iPhone X
Simply force restart your device when still your FaceTime doesn't close on iPhone X. here are the steps for this.

Press the 'Volume Up' button and release it instantly.

Repeat this with 'Volume Down' button.

Lastly, give a long press to the 'Power' button and keep holding until you find Apple logo on the screen.

4. Reinstall the FaceTime App
If none of the above tips works, you need to delete and install the FaceTime app again in your iPhone X. To do this, just give a long tap on the FaceTime icon from your home screen. When you do this, the app icon will shake popping up a cross at the left corner of the icon. You need to tap on the cross icon and delete the app. Now, follow the traditional way of installing the app i.e. go to the App Store and install FaceTime from there. Then check if your iPhone X is still stuck on FaceTime call ending or not.

5. Reset Network Settings
You can also reset your network setting when your iPhone X stuck on FaceTime call ending. Doing this will remove your entire network settings like Wi-Fi passwords etc. Open 'Settings' and move to 'General' > 'Reset' > 'Reset Network Settings'. Key in the passcode and confirm resetting.

6. Reset All Settings
Here is the next tip in case you realize the above one wasn't helpful. Go to 'Settings' in your phone and tap 'General' > 'Reset' > 'Reset All Settings'. Enter the passcode when asked and then confirm the actions. This method will take your settings to default and we hope that iPhone X won't stuck on FaceTime ending anymore.


7. Restore iPhone using iTunes

If nothing works, it's time to consider for restoring your device. Use iTunes for the purpose. Besides, this method will erase everything in your phone. The steps are as follows:


Launch iTunes and connect iPhone X with the PC.


Now, go to the device icon at the top and click 'Summary'.


Subsequently, click on 'Restore iPhone' and confirm the restoring from the next pop-up.

After restoring, "FaceTime ending stuck on iPhone X" problem might be vanished.


You may also like:Gihosoft Mobile Transfer: 1 Click Data Transfer from Phone to Phone

Gihosoft Android data recovery Free is a super awesome software specialized in Android file recovery. With this program, you are able to recover deleted photos, music, videos, messages, contacts, call logs, WhatsApp messages, Viber chat history and more from Samsung, Huawei, LG, HTC, Motorola, Google, Oneplus, Sony, Lenovo, ZTE and other Android devices directly. Meanwhile, this Android data recovery software is available for both Windows and Mac platforms.

For now, check:Free iTunes/iPhone Backup Extractor for iPhone, iPad

Jihosoft iTunes Backup Extractor free is a powerful tool to recover and extract important data from iPhone, iPad & iPod touch backup on Windows or Mac.

If you can’t sync with iTunes and want to rescue data from a disable iPhone, you could try Gihosoft iPhone Data Recovery. Also feel free to ask questions on the iDevice is disabled error in the comments section below.

Monday, September 3, 2018

Best Self-Defense iPhone apps 2019


How to Keep Safe using Self-Defense iPhone apps

Best Self-Defense iPhone apps:


Nowadays it is very difficult to walk on the streets and to stay home alone because the criminal behavior is increasing day by day. They put a knife on your neck or gun on your head and in seconds take away everything you have earned. In such situations, people get scared and unable to fight them. But the time has come that you should fight back and defend yourself by getting some training with the best self-defense apps for iPhone.

There is no need to spend more money and get trained from academy if you have an iPhone/ iPad/ iPod Touch. And so to save your few bucks we have collected the best self-defense apps for iPhone and iPad.


Take Self Training using Very Best Self-Defense iPhone apps
1. Noonlight-formerly SafeTrek


Now walk on the streets, fearless. Once you download the Noonlight app no need to worry about your safety. This app is designed with advanced technology, so wherever you feel insecure, just with a one-touch, you can get emergency help. Whenever you feel unsafe just hold down the button. And release the button when you reach home or to the car or any safe place and enter the four-digit code. Moreover, if you are in danger then release the button and do not enter the phone 4-digit code, the local police will get alert, and then they will be there soon for your help. If you still have few doubts about this apps and features then use free for the first month and then buy a subscription for $2.99/month.
2. Marine Martial Arts


Marine Martial Arts are the affordable self-defense app for iPhone because it only cost you $1.99. This app contains the US martial arts training manual of around hundreds of pages. Marine Martial Arts are the ultimate guide on how to protect yourself from the armed and unarmed opponent. If you want to learn techniques hand to hand fights, then you must know some basic factors, which are a Physical balance, Timing, Distance, Position, Momentum, and Mental Balance. Additionally, you will also get 15-fitness-related calculators in bonus.
3. Boxx


Stay healthy and fit with Boxx training app. Boxx is a self-defense app for iPhone which focuses on Boxing, Cardio, Yoga and flexibility of your body. Once you purchase the Boxx up you will get full access to the Boxx vid-app along with TheBoxxMethod.com. Besides to stay slim and tight you will get a range of healthy recipes. A lot of high-quality videos are available to download offline so that, you can watch anytime which suits your schedule. It is bit costly, $9.99/month and $99.99/year and with both subscription, you will get 14-day free trial.
4. fightTIPS Self Defense Guides


Get yourself trained with self-defense guides mentioned in this app. These tips are given by the expert Shane Fazen in very convenient and simple language. Now you can defend yourself from the thieves, rapists, bullies, attackers and such anti-social peoples. The app is very easy to use once you download the app on your iPhone you will come to know how to use the app, and it is damn attractive.Jihosoft Android Data Recovery: the best Android Data Recovery software for Windows and Mac to recover deleted contacts, messages, photos, videos, WhatsApp and etc from Android devices.
5. Krav Maga Pro


Krav Maga is actually based on Israel Defense Forces. All the techniques are already learned by Israel’s army which includes the men and women of 18 to 51 age group. The tactics are only based on two factors one is instinctive movements which are easy to learn and remember and the other is it doesn’t require some definite size, length or age, anyone can learn. Although Krav Maga martial arts is very short-term training so your time will be saved too. The best part of this app is you will see videos and get the realistic training along and simultaneously you can track your progress from the level 1. Gear up and begin your training with Krav Maga Pro at only $7.99.

Kickstart training of Defence at your home and Learn Everywhere to be smart. Also, make others by sharing this thought and help her. If you need messages as evidences, you can follow this guide to print out text messages from iPhone for court, also you can print iPhone contacts into paper or PDF.

If you lost important messages from iPhone, you can use Gihosoft iPhone Data Recovery to get them backup without backup, or extract them from iTunes backup with iTunes Backup Extractor.


Free iTunes/iPhone Backup Extractor for iPhone, iPad

Jihosoft iTunes Backup Extractor is a powerful tool to recover and extract important data from iPhone, iPad & iPod touch backup on Windows or Mac.

Thursday, August 30, 2018

How to Access iPhone Photos on PC 2019


How to Access iPhone Photos on PC 2019
Access iPhone Pictures on PC via Windows Explorer

You can also use Windows Explorer on your Windows (10/8/7) and utilize its built-in features to access your iPhone photos.


Follow these instructions:


First, install iTunes on your computer to resolve any compatibility issues.


Connect your iPhone to your Windows PC.


Now open Windows Explorer and click on This PC.


You will see your iPhone as one of the connected devices. Double-click on it and navigate to the DCIM folder.


Select all the photos available in that folder and use right click to Copy them.


Now navigate to your desired folder on your computer and right click and select Paste. Your selected photos will be transferred to your PC.
3 Access Photos from iPhone on PC with Microsoft Photos APP

Microsoft Photos is a built-in Windows 10 software. You can use it to access your iPhone photos and transfer them to your PC pretty conveniently.


Follow these instructions:


Install iTunes to make sure that there are no compatibility issues and your iPhone gets detected by your Windows PC.


Plug in your iPhone via USB cable to your PC.


Launch Microsoft Photos app on your computer.


Now click on Import option and select your iPhone photos you wish to transfer.


Click on Continue to start the photos transfer process.
4 Access iPhone Photos on PC Using AutoPlay

AutoPlay is one of the features of Windows 7,8,10 that offers the convenience to access useful options quickly whenever you connect a storage device to your computer. You can use it to access your iPhone photos and then transfer them to your desired folder on your computer.


Follow these instructions to transfer your iPhone photos to your PC using AutoPlay:


First, make sure you have iTunes installed on your computer so that your iPhone gets detected without any issues.


Connect your iPhone to your Windows PC using a compatible USB cable.


If a notification prompts asking you to Trust your connected device, do it. Once you do that, the AutoPlay window will appear.


Now click on Import Pictures and Videos option from AutoPlay window and then navigate to the DCIM folder. There, you will see subfolders and your iPhone photos within them.


Copy them via right-click to copy feature of Windows and then Paste them in your desired folder on your computer’s hard drive. Your iPhone photos will start transferring to your PC.

Jihosoft Android Data Recovery: the best Android Data Recovery software for Windows and Mac to recover deleted contacts, messages, photos, videos, WhatsApp and etc from Android devices.

Gihosoft Android data recovery Free is a super awesome software specialized in Android file recovery. With this program, you are able to recover deleted photos, music, videos, messages, contacts, call logs, WhatsApp messages, Viber chat history and more from Samsung, Huawei, LG, HTC, Motorola, Google, Oneplus, Sony, Lenovo, ZTE and other Android devices directly. Meanwhile, this Android data recovery software is available for both Windows and Mac platforms.For now, check:Free iTunes/iPhone Backup Extractor for iPhone, iPad

Jihosoft iTunes Backup Extractor free is a powerful tool to recover and extract important data from iPhone, iPad & iPod touch backup on Windows or Mac.

You may also like:Gihosoft Mobile Transfer: 1 Click Data Transfer from Phone to Phone

If you can’t sync with iTunes and want to rescue data from a disable iPhone, you could try Gihosoft iPhone Data Recovery. Also feel free to ask questions on the iDevice is disabled error in the comments section below.

Tuesday, August 28, 2018

How to Fix The problem “iPhone is Disabled, try again in 23614974 minutes”


How to Fix The problem “iPhone is Disabled, try again in 23614974 minutes”
The problem “iPhone is Disabled, try again in 23614974 minutes” is a common occurrence, and it’s getting iPhone users frustrated. You may be asking yourself, “how can I wait for 46 years before unlocking my iPhone, and why are my getting this notification?”
Firstly, we shall be looking at the reasons why iPhone is restricting you from accessing your files and data. Secondly, we shall be discussing ways to fix this issue.
Why Is My iPhone Disabled for 46 Years?
Here are the reasons why you are getting the notification “iPhone is Disabled, try again in 23614974 minutes”.

This notification is usually a glitch or bug in the iOS software.

You may have entered the wrong passcode too many times, causing iOS security features to delay you for too long.

A bug may have caused your iPhone time machine (clock) to malfunction or reset to default, thereby over timing your next trial.

#1. Erase iPhone via iCloud

When your iPhone is disabled for 46 years, you can open it with iCloud using “Find My iPhone” feature. However, for this method to work, you must have enabled Find My iPhone before now. Your iPhone should be connected to internet as well.

Step 1. Log in to the official iCloud account using your friends Safari browser. Enter your Apple ID and password when asked to do so.

Step 2. Click “Find iPhone” and tap the “All Devices” option. iCloud will display a list of devices you’ve linked to your iCloud account. Select your iPhone to erase it.

Step 3. Choose “Erase iPhone” option, and confirm your selection. After a while, iCloud will automatically erase your iPhone, and open it.


#2. Restore iPhone with iTunes

Just like iCloud, iTunes can help you to restore your iPhone and remove the disabled notification on your lock screen. Though some users complained that the recovery mode way was not working, you can still try restore iPhone if you synced your iPhone to iTunes in the past.

Step 1. Open iTunes on your Mac or PC which you synced iPhone before.

Step 2. Connect your iPhone using a USB cable.

Step 3. Wait for iTunes to sync and back up your iPhone. (If iTunes asks for any password, this way won’t be available for you.)

Step 4. Click “Restore iPhone” on iTunes. Confirm it by clicking “Restore” to continue.

Step 5. When it’s finished, you need to set up your iPhone. When you get to the Set-UP screen, click “Restore from iTunes”.

Step 6. Select your device in iTunes and choose the most relevant backup by looking at the date and size.


You may also like:Gihosoft iPhone Data Recovery

Must Read:Gihosoft Free Android Data Recovery

Must Read:Jihosoft iTunes Backup Unlocker

Jihosoft iTunes Backup Extractor free is a powerful tool to recover and extract important data from iPhone, iPad & iPod touch backup on Windows or Mac.

Sunday, August 26, 2018

How to Tell If Someone Has Blocked Your Yahoo Email?

How to Tell If Someone Has Blocked Your Yahoo Email?


1. How to Tell If Someone Has Blocked Your Yahoo Email?

However, unfortunately the problem is, it is impossible to tell if someone has blocked your Email on Yahoo. There is no way to be 100% sure that someone has blocked you from sending him/her emails. When you send an email to someone who has blocked you, you will not receive a failure notice confirming your message was not delivered. Besides, the email you send will never arrive to their inbox and they will not know you have sent them a message.


The only way to know is you will notice that the person doesn't reply to your email. So, if the email you send them requires a reply but you don't get a reply, it is possible that the person has blocked your email and as such the email was undelivered.
2. You May Try Some Psychological Tactics!

So is there any way can help figure out why you have been blocked on Yahoo email? well, at the technology level the answer is a NO but we are human and we can use some psychological tactics to figure this out.

In fact the only way helps to know if a person is receiving your emails is to try and make the email sound more urgent. For example, you can try to tempt the person to open the message by using an very urgent subject like "Urgent! Reply ASAP!" Or, you can try a controversial message header that will provoke the person to open the message. If you don't receive a reply in a few weeks, then it is likely that the person may have blocked you or for some reason they are unable to receive your messages.You may also like:Gihosoft iPhone Data Recovery

Must Read:Gihosoft Free Android Data Recovery

Must Read:Jihosoft iTunes Backup Unlocker

Jihosoft iTunes Backup Extractor free is a powerful tool to recover and extract important data from iPhone, iPad & iPod touch backup on Windows or Mac.

You may also like:

Gihosoft Total Video Converter is a professional all-in-one video tool that enables you to convert videos and audios into various different formats.

You may also like:online youtube downloader


3. Read Receipt? Probably It Cannot Help at All

Yes, someone may think of Read Receipt but Yahoo and web mail accounts lack a "Read Receipt" system. Unless the account is tied to a downloadable mail program like Outlook or Thunderbird, there is no way for you to know the recipient has received the message. To say the least, the person can totally ignore the read receipt if they would not like to reply your emails.

So in some way, it seems that it is meaningless to figure out whether your friends have blocked you or not when you don't get a reply – they just want to ignore your emails.
Additional Tip: How to Delete Emails from Your iPhone

Anyway, in case you just want to delete all the stupid emails you have sent to the person who has blocked you, or you are worried that your email account may have problems and may have been accessed by other people, it may be a good idea to delete all the emails on your iPhone. Click here to see how you can delete all the emails on your iPhone.

It may be impossible to tell if someone has blocked your email on Yahoo except for when they fail to reply to your messages for an extended period of time. If that happens, send them an email on an alternative account, sometimes Yahoo Mail itself may be having issues. In this case, you may need to solve the problem before your message can be sent.

Remove Objects From Photos With This Simple Photo Editor App [Deals Hub]

A new report from The Wall Street Journal claims that Apple ranks its own apps above others on the App Store. Apple has refuted the claims ...